BigCommerce
Use the instructions below to enable Splitit installments on your BigCommerce site, including On-Site Messaging.
Installing the Plugin
The plugin is installed through the BigCommerce admin panel of your store.
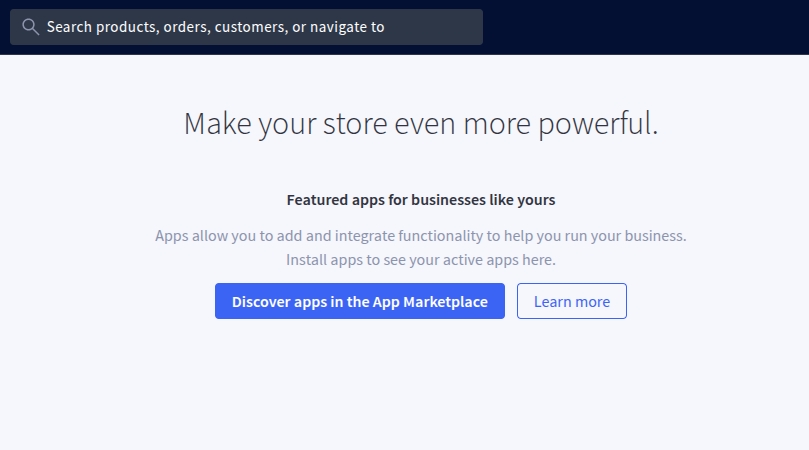
In your BigCommerce admin, select Apps -> App marketplace and click on Discover apps in the App Marketplace.
In the BigCommerce App Marketplace, search for "Splitit" in the search bar.
Once the plugin is located, click on it, then select Get This App then Existing BigCommerce store - Login (if applicable).

Then click Install. BigCommerce will download and install the plugin.
Next, at the confirmation page, check the box and then click the button to Confirm.
Logging Into Splitit and Enabling the Plugin
Logging Into Splitit
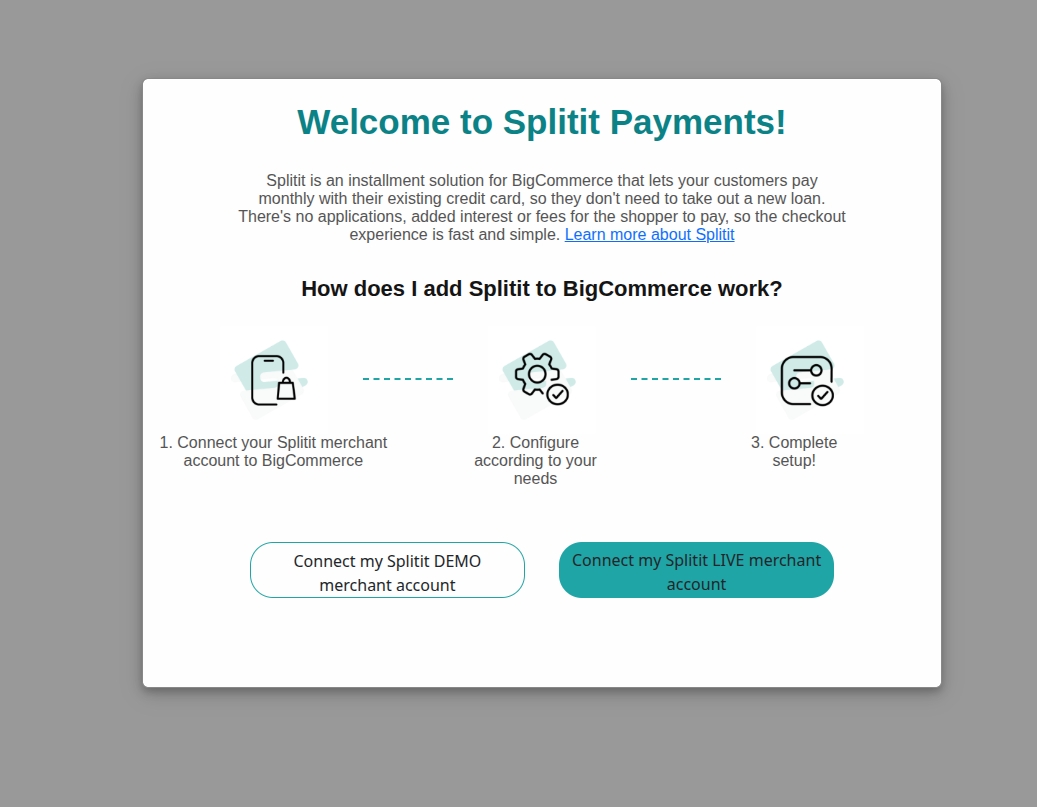
Log into your Splitit account using your BigCommerce admin panel. Go to Apps -> Splitit and choose the account you want to use: for testing, choose Connect my Splitit DEMO merchant account, which will take you to your Splitit sandbox account login page; for real transactions, choose Connect my Splitit LIVE merchant account, which will connect you to Splitit's production account login page.
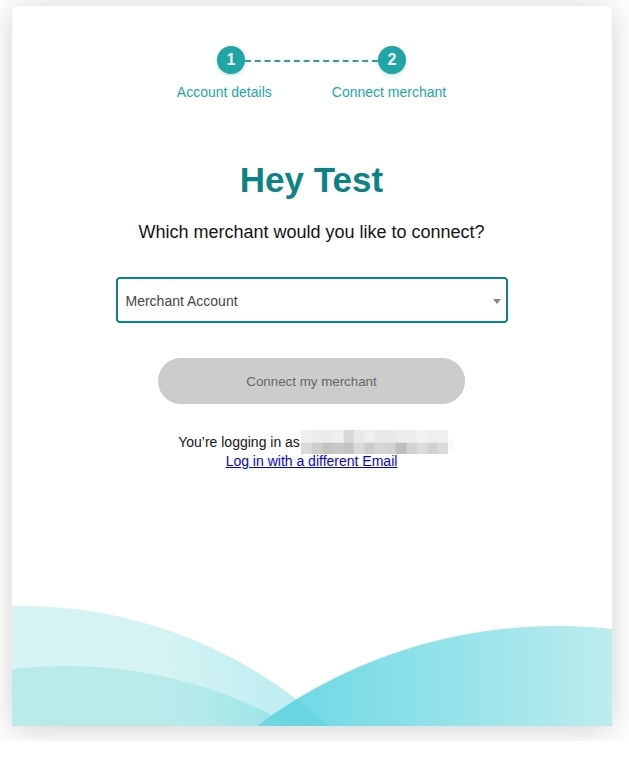
Next, choose your Merchant Account, then your Terminal Account (they will be prepopulated; the Terminal Account will show up once you have filled in your Merchant account).
Enabling the Plugin
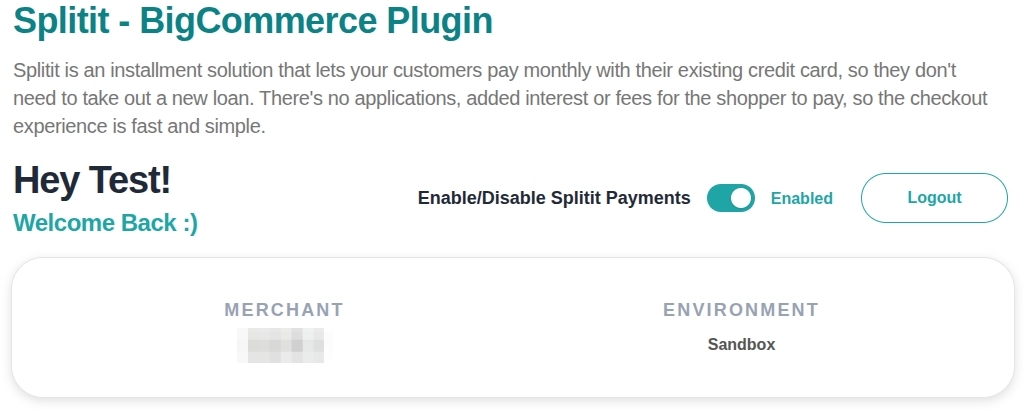
Finally, go to the plugin's configuration (Apps -> Splitit) and select Enable Splitit Payments.
Scroll down the page and click on Save Changes at bottom right.
Read This If You Have More Than One Storefront (Multi-Storefront Configurations)
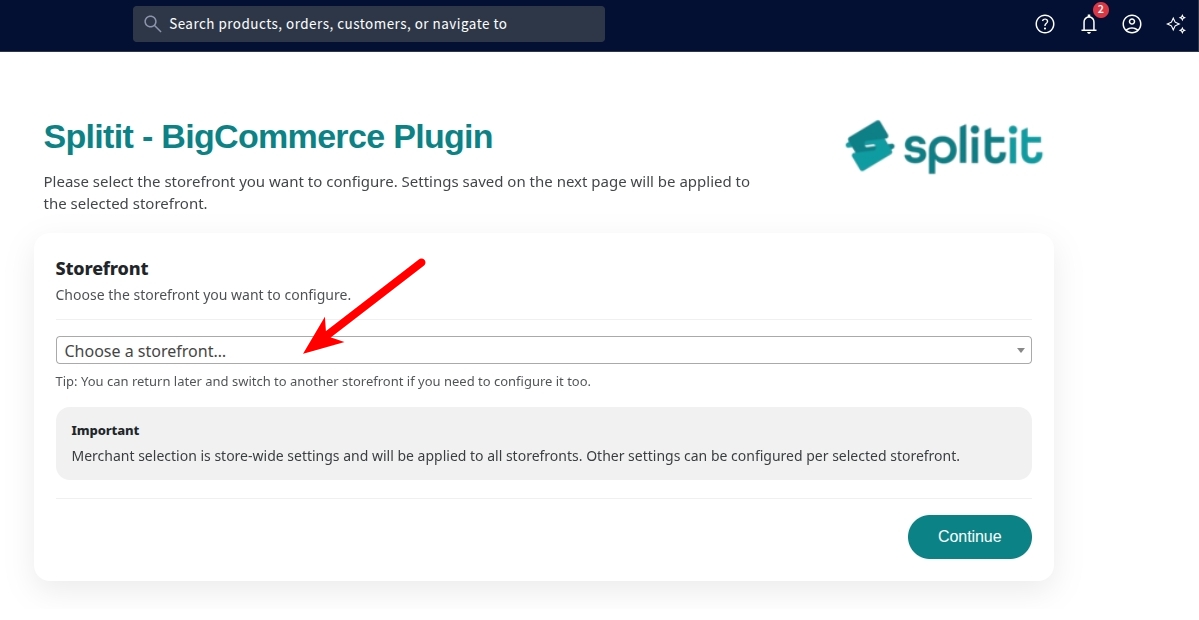
Splitit supports BigCommerce's Multi-Storefront logic. If it is enabled on your website, each time you open the Splitit extension's configuration page, you'll see a request to choose a storefront.
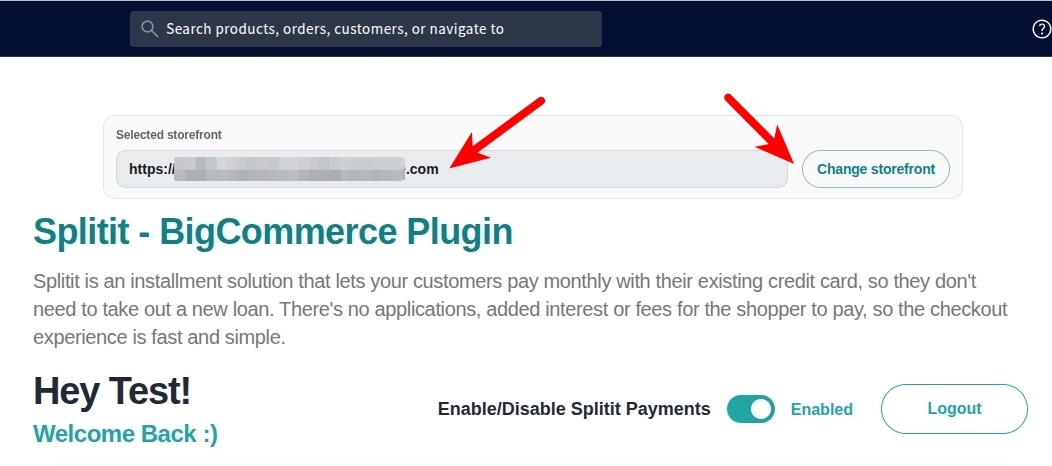
Once a store is chosen, at the top of the page you'll see its URL, as well as a Change storefront button, which allows you to switch to another store.
Things to note:
- Settings are always applied only to the selected store. If the same settings are needed for multiple stores, then each store must be selected and configured with the same setup.
- If your website has only one storefront, there will be no store selector or notification about the currently chosen store. You’ll see the Splitit extension's configuration page right away after selecting the Splitit plugin in the Apps menu.
Plugin Configuration
Once you have installed the plugin and logged into Splitit, you should configure your payment method settings using the parameters defined below.
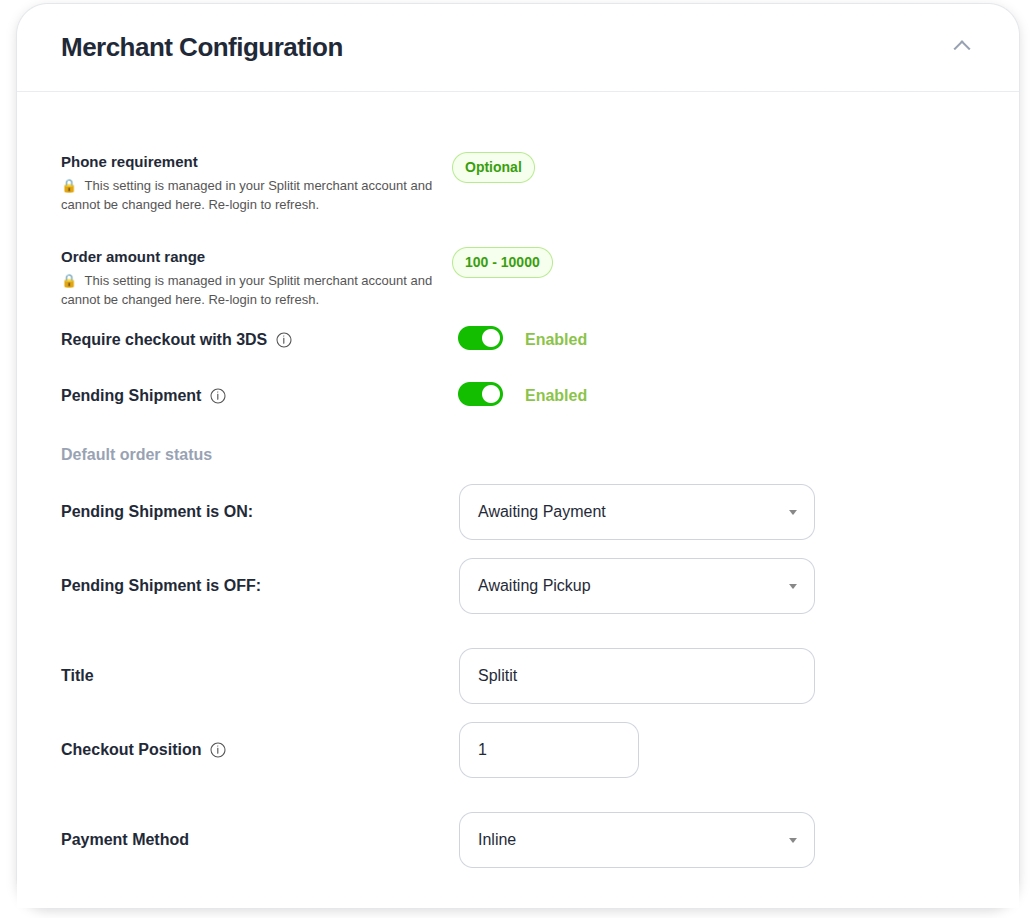
Phone requirement - Determines whether a customer phone number is required (i.e., Required or Optional). Important: this setting is visible here in the plugin's configuration but is managed in your Splitit account (note the lock icon); if it is changed at Splitit, make sure to refresh to view the updated values.
Order amount range - Sets the minimum–maximum cart total for which Splitit is shown (e.g., 100 - 10000). Splitit is hidden at checkout for carts outside this range. Important: this setting is visible here in the plugin's configuration but is managed in your Splitit account (note the lock icon); if it is changed at Splitit, make sure to refresh to view the updated values.
Require Checkout with 3DS - When enabled, shoppers must pass a 3D Secure verification step after entering their card information.
Pending Shipment - This option defines how transactions are handled at checkout. When Pending Shipment is enabled, transactions are simply authorized at checkout and are fully captured later (e.g., when you ship). This is useful for stores that capture upon order fulfillment rather than checkout.
Default Order Status
-
When Pending Shipment is OFF – The default order status to apply when Pending Shipment is off (choose from the available statuses in the dropdown).
-
When Pending Shipment is ON – The default order status to apply when Pending Shipment is on (choose from the available statuses in the dropdown)..
Title - The name shown to shoppers for the payment method at checkout (default: Monthly credit card payments - no fees).
Checkout Position - The position of Splitit relative to the other payment methods at checkout.
Payment Method - How Splitit is presented at checkout: Inline means that Splitit card fields and plans are embedded directly into checkout, while Redirect means that the shopper is sent to a Splitit-hosted page to complete payment.
On-Site Messaging Settings
After you have configured the plugin, you should set up On-Site Messaging. On-Site Messages show Splitit installment breakdowns throughout your site, notifying shoppers early on during their site sessions that you offer installment payments.
There are two types of On-Site Messages, Strips and One Liners, and they are configured separately for your Home Page, Shop/Catalog Page, Product Page, Cart Page, and Checkout Page. You can only set one type of message per page. (Note that the Home Page offers Strips only.)
- Begin by defining the global setting for number of payments at the top of the On-Site settings section:

- Then set messaging for the individual page types, clicking on the dropdown for each:
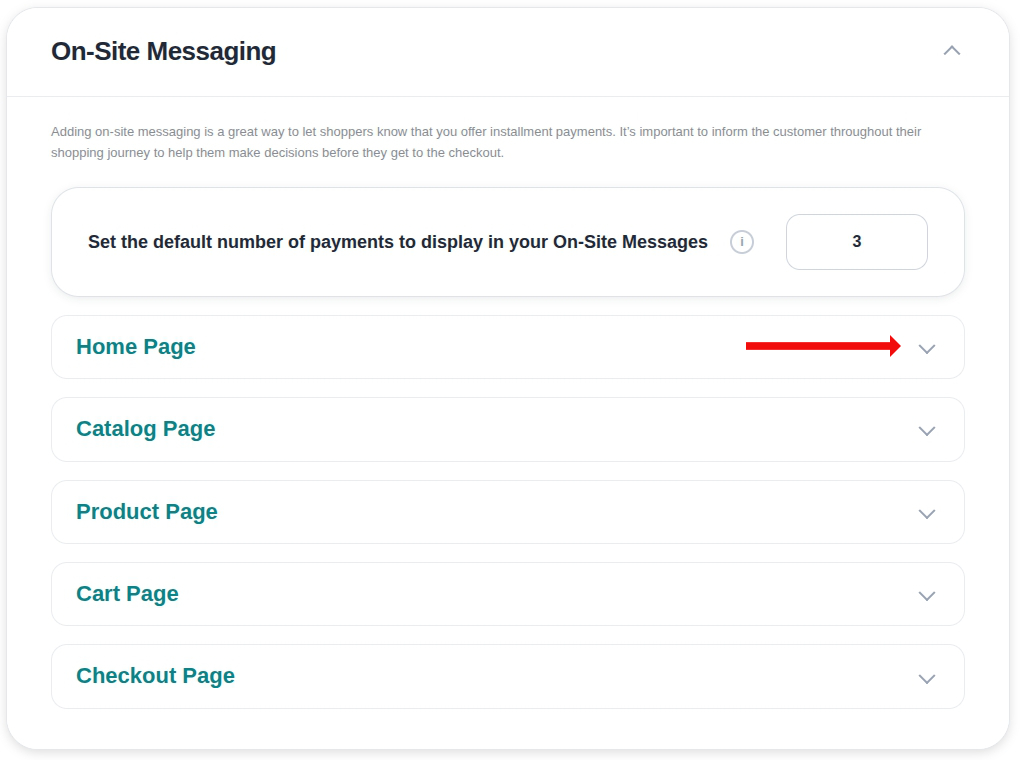
The settings for Strips and One Liners for each page type are nearly identical so are only covered one time below.
Strips
Strips are full-width notification bars across the top or bottom of a page (for example “Pay with installments. No application or fees.”):
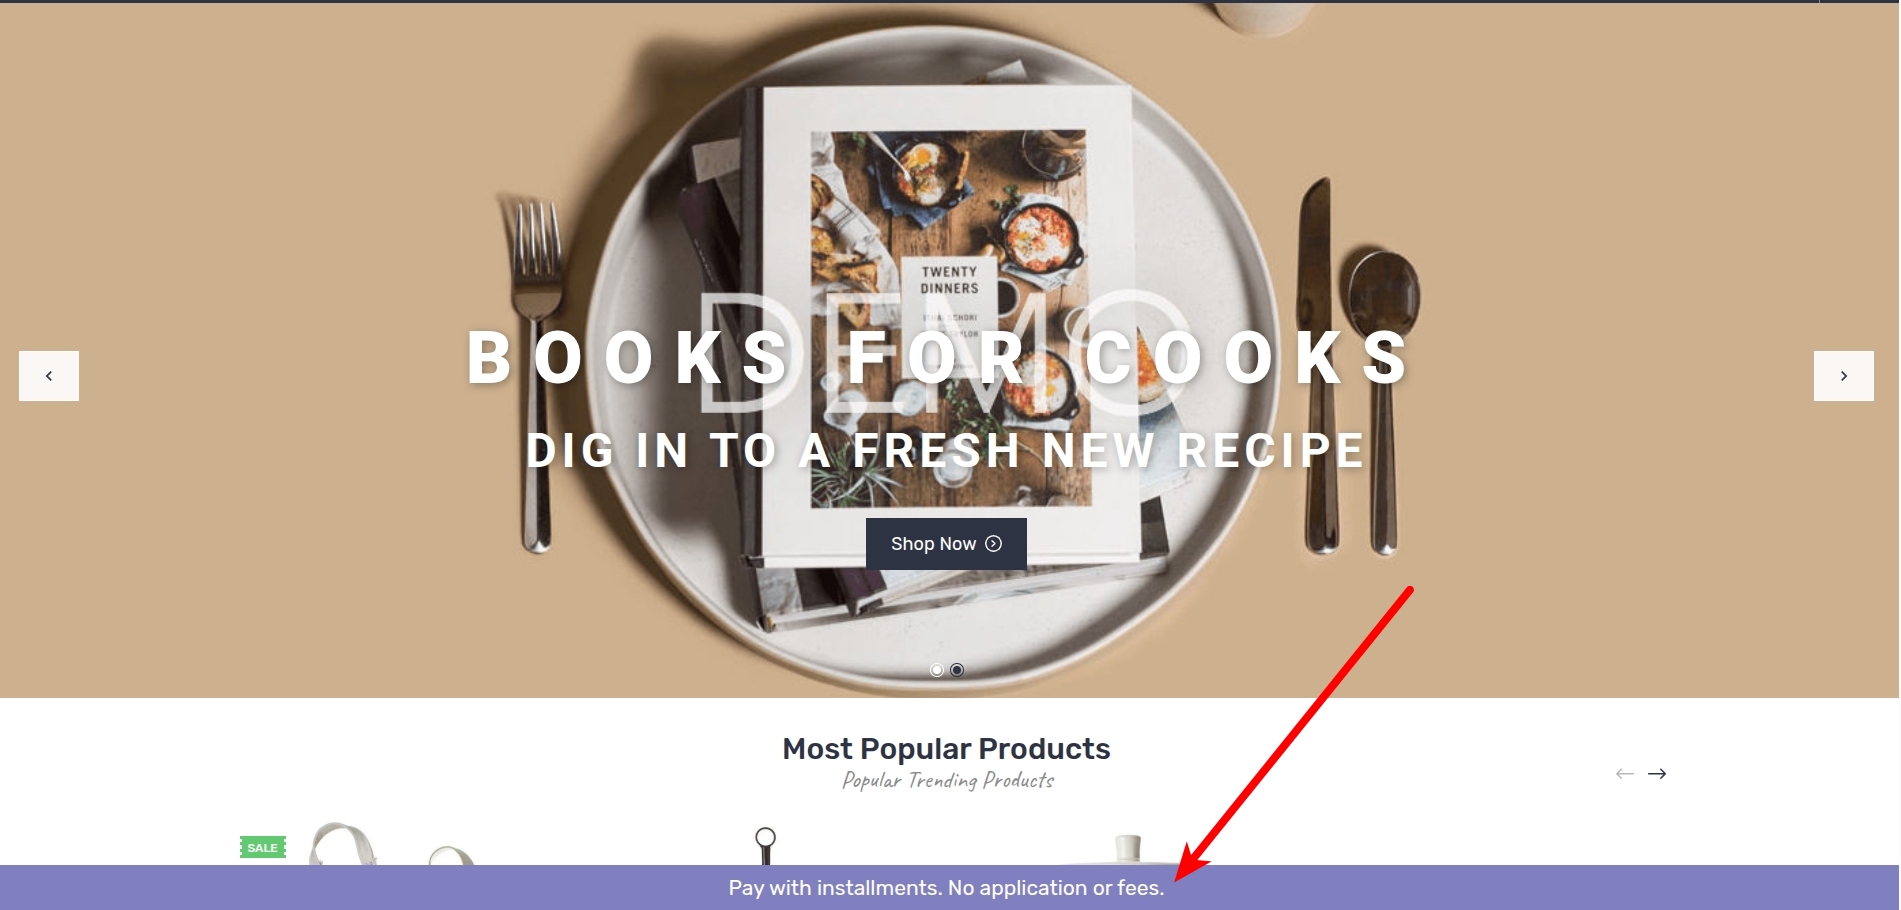
Strip Settings
Settings for Strips are defined individually below.
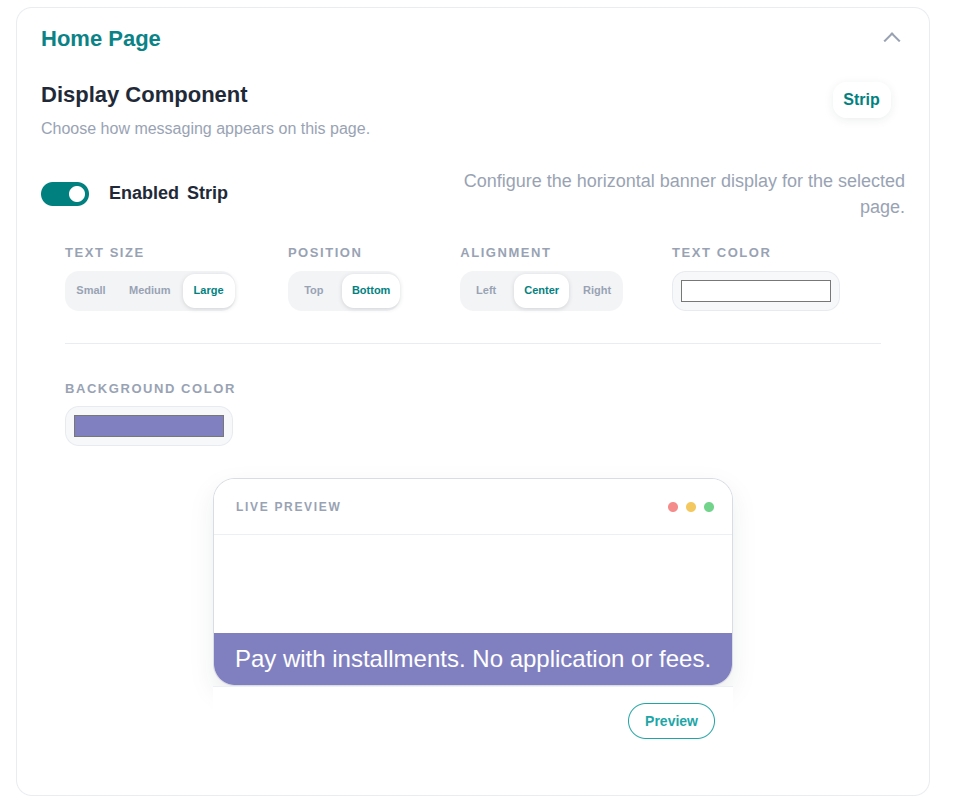
Enabled Strip/Disabled Strip - This switch allows you to turn Strips on or off for the current page type (i.e., "Catalog Page"). Only one message type can be enabled for a given page type.
Text Size- Sets the size of the Strip's text; options are Small, Medium or Large.
Position- Defines where the Strip is docked; set Top or Bottom.
Alignment- Sets the horizontal alignment of the Strip's text; options are Left, Center, or Right.
Text Color- Sets the color of the text on the Strip. It can be selected by color picking or by entering RGB, HSL, or HEX values. To switch from RGB to any other mode, click on the letters RGB.
Background Color - Sets the background color of the Strip. It can be selected by color picking or by entering RGB, HSL, or HEX values. To switch from RGB to any other mode, click on the letters RGB.
The Preview button applies the changes to the message example in the Live Preview box.
One Liners
One Liners are short installment texts placed next to product prices (for example on your Catalog or Product pages).
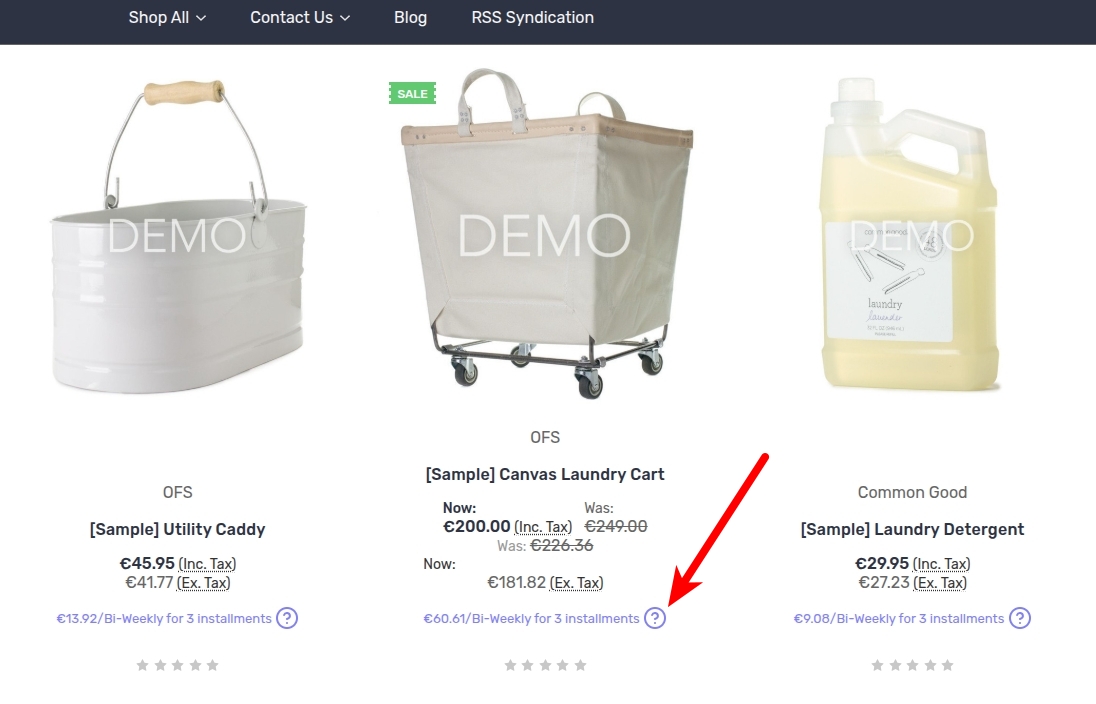
One Liner Settings
Settings for One Liners are defined individually below.
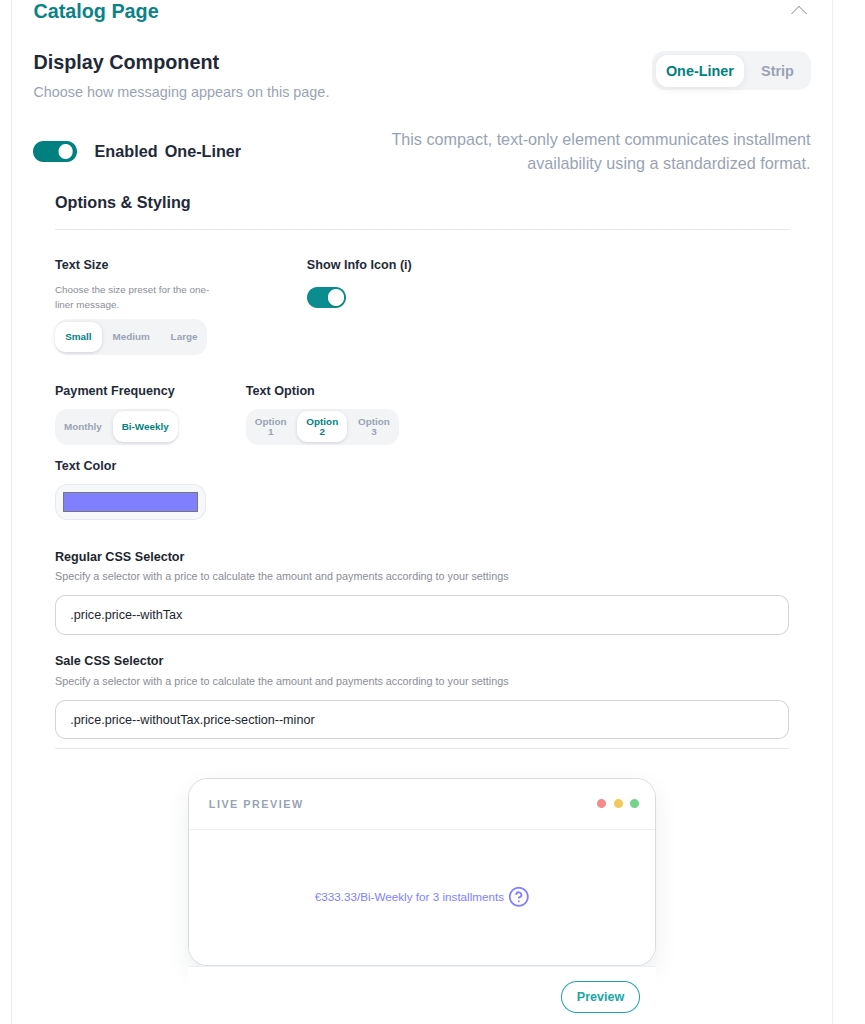
Enabled One liner/Disabled One Liner - This switch allows you to turn One Liners on or off for the current page type (i.e., "Catalog Page"). Only one message type can be enabled for a given page type.
Text Size - Sets the size of the One Liner's text; options are Small, Medium or Large.
Show Info Icon - Shows the (?) tooltip icon, which opens a Learn More popup.
Payment Frequency - Sets the installment cadence shown in the message; options are Monthly or Bi-Weekly.
Text Option - Chooses alternative wordings; set Option 1, Option 2, or Option 3.
Text Color - Sets the color of the text on the One Liner. It can be selected by color picking or by entering RGB, HSL, or HEX values. To switch from RGB to any other mode, click on the letters RGB.
Regular CSS Selector - This entry helps identify where the One Liner should be placed for regular products. Examples: ".yourClassName" or "#yourId".
Sale CSS Selector - This option helps identify where the One Liner should be placed for the products identified as sale products. Examples: ".yourClassName" or "#yourId".
The Preview button applies the changes to the message example in the Live Preview box.
Custom CSS
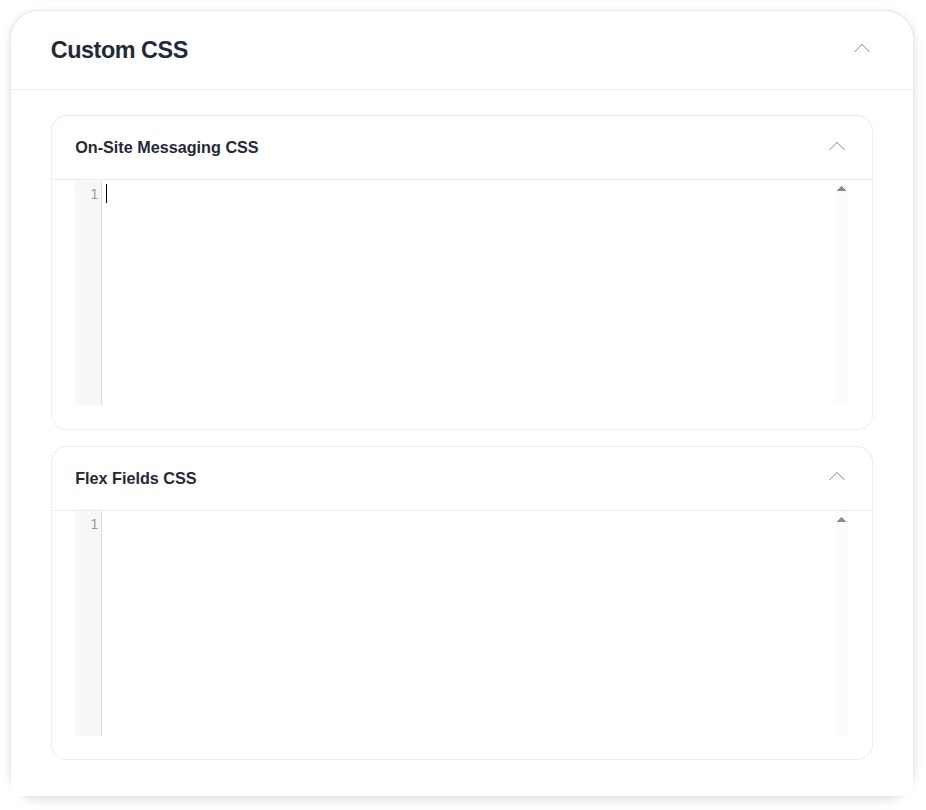
On-Site Messaging CSS
This block allows you to add custom CSS to the Splitit On-Site Messaging blocks on your storefront.
Flex Fields CSS
This block allows you to add custom CSS to the Splitit blocks on your checkout page (if you are using inline checkout, i.e. "Flex Fields").
Custom Success Page
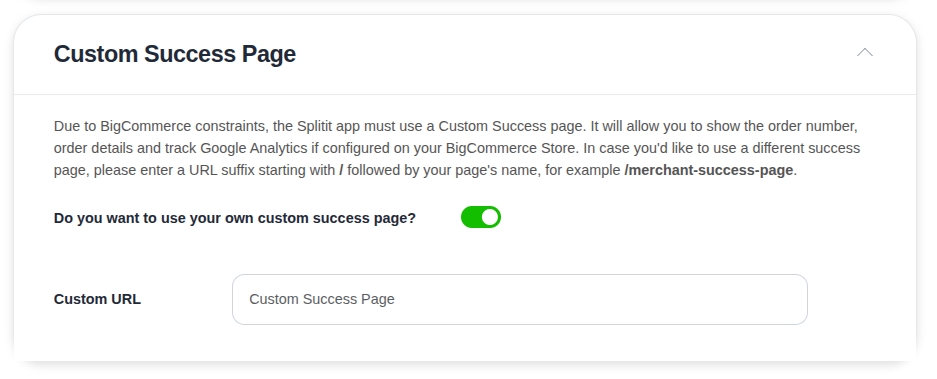
Unlike BigCommerce's built-in payment methods, Splitit works with BigCommerce through an API. Because of this, once shoppers place a successful order, they don’t see a success page, but instead are redirected to an empty cart page. However, you can enable your own success page to allow customers to see confirmation of the placed order.
Admin Utilities
View Orders
You can see an order's details in the BigCommerce admin by going to Orders -> All Orders -> + (Next to Your Desired Order).

The row will expand to show the order's details:
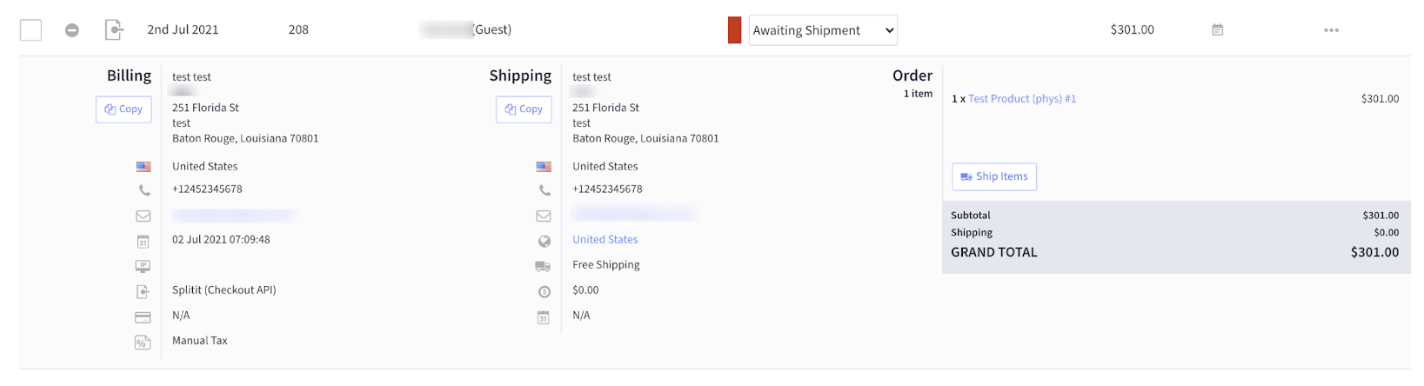
Keep in mind that orders that were created with Pending Shipment set to off are charged only when the order is shipped.
Refund Orders
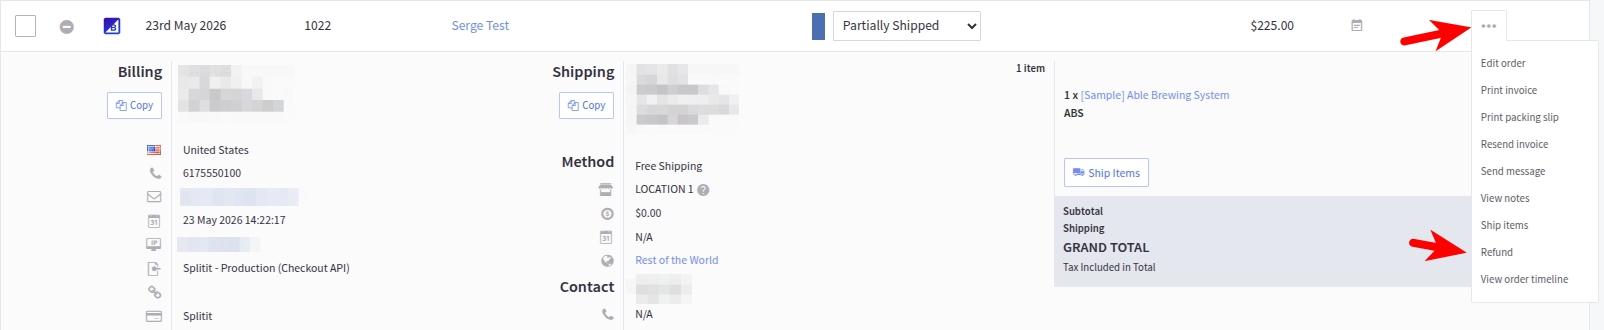
To create a partial or full refund, open the order in the admin panel by going to Orders -> All orders -> Three Dots Menu (...) for Your Order, then click on Refund.
Partial Refund
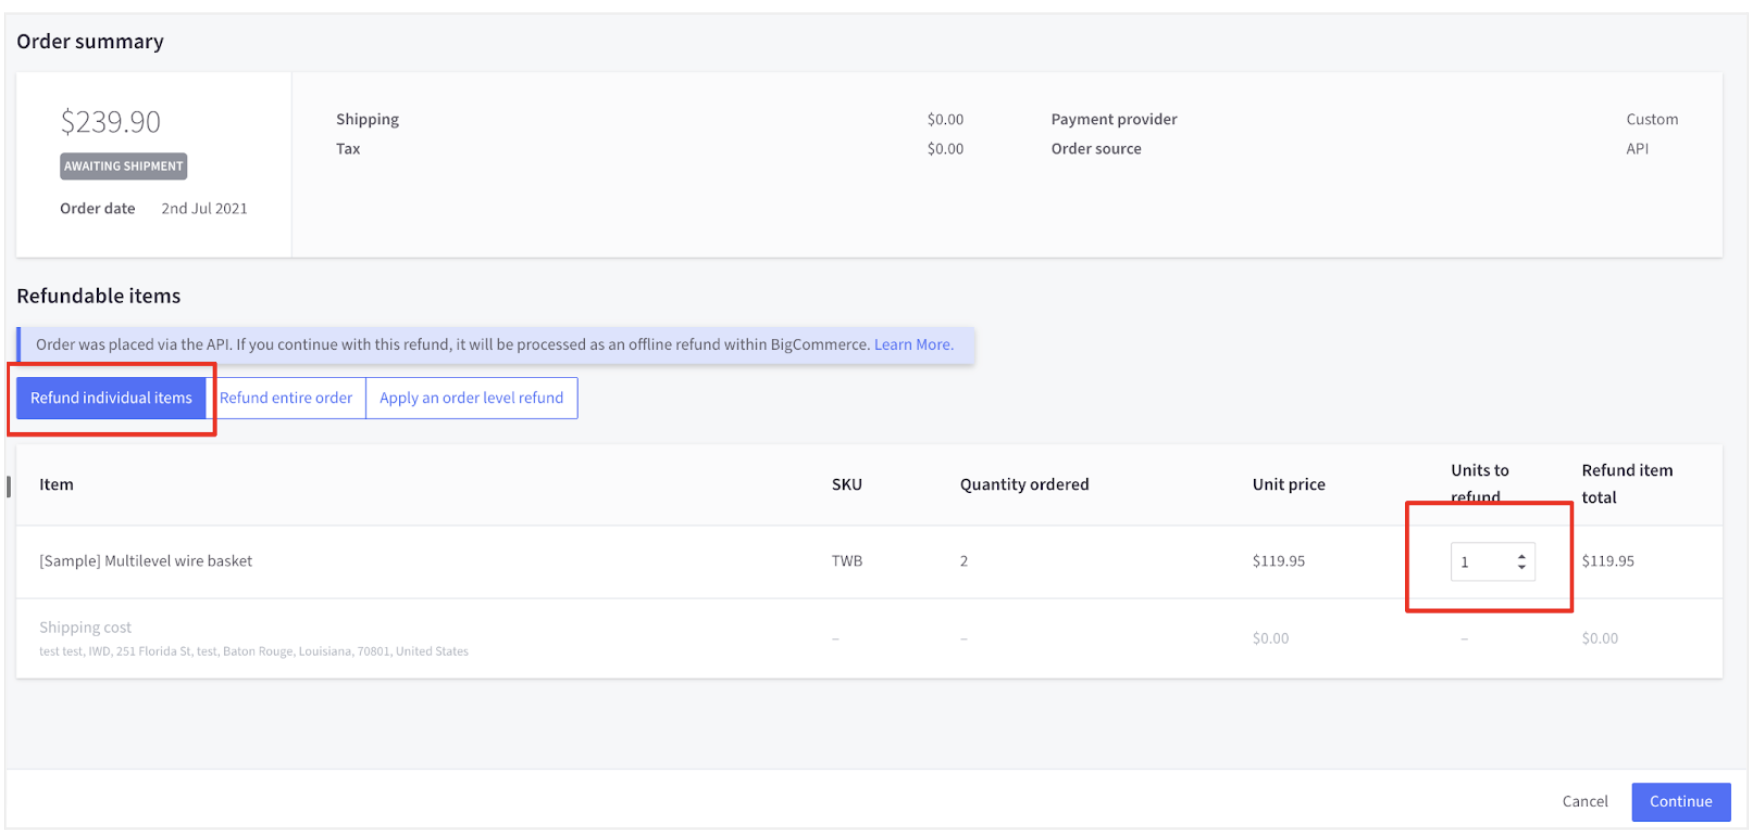
To create a partial refund click on Refund Individual Items. Select the number of Units to Refund using the arrows. Click on the Continue button.
Select one of the refund methods below to complete your refund:
- Store Credit - The amount will be credited to the shopper's account but no actual funds will be returned.
- Refund customer through third party provider - The refund will be processed externally to BigCommerce. Choose this option if you want to refund customers via Splitit.
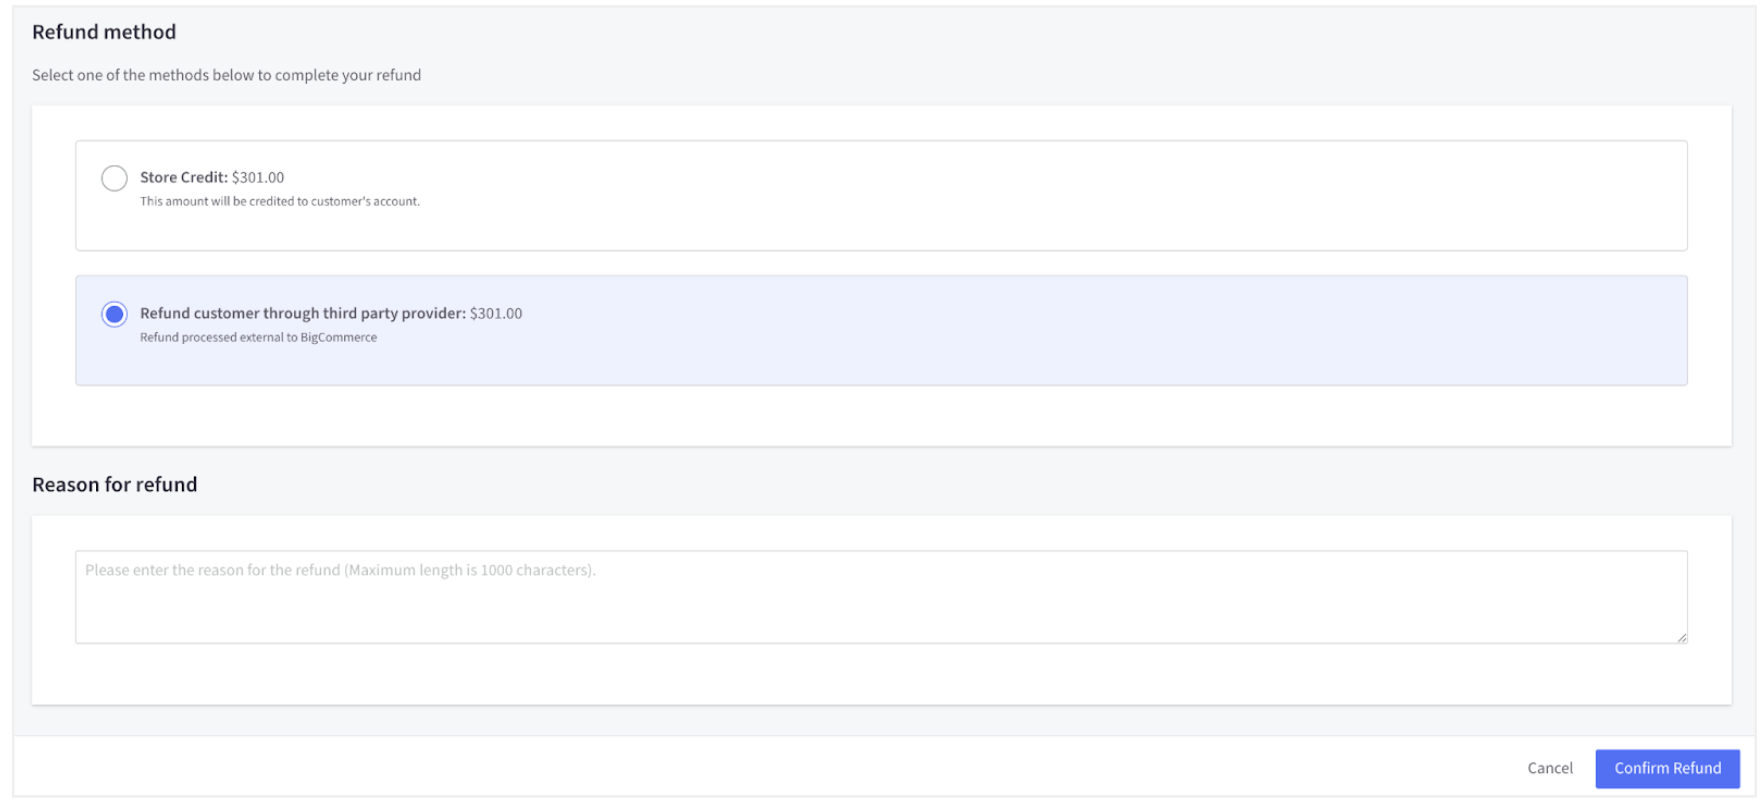
Add a reason (optional). Click on the Confirm Refund button. The order status will be changed to Partially Refunded.
Full Refund
To create a full refund, choose Refund entire order (after going to Orders -> All orders -> Three Dots Menu (...) for Your Order -> Refund.)
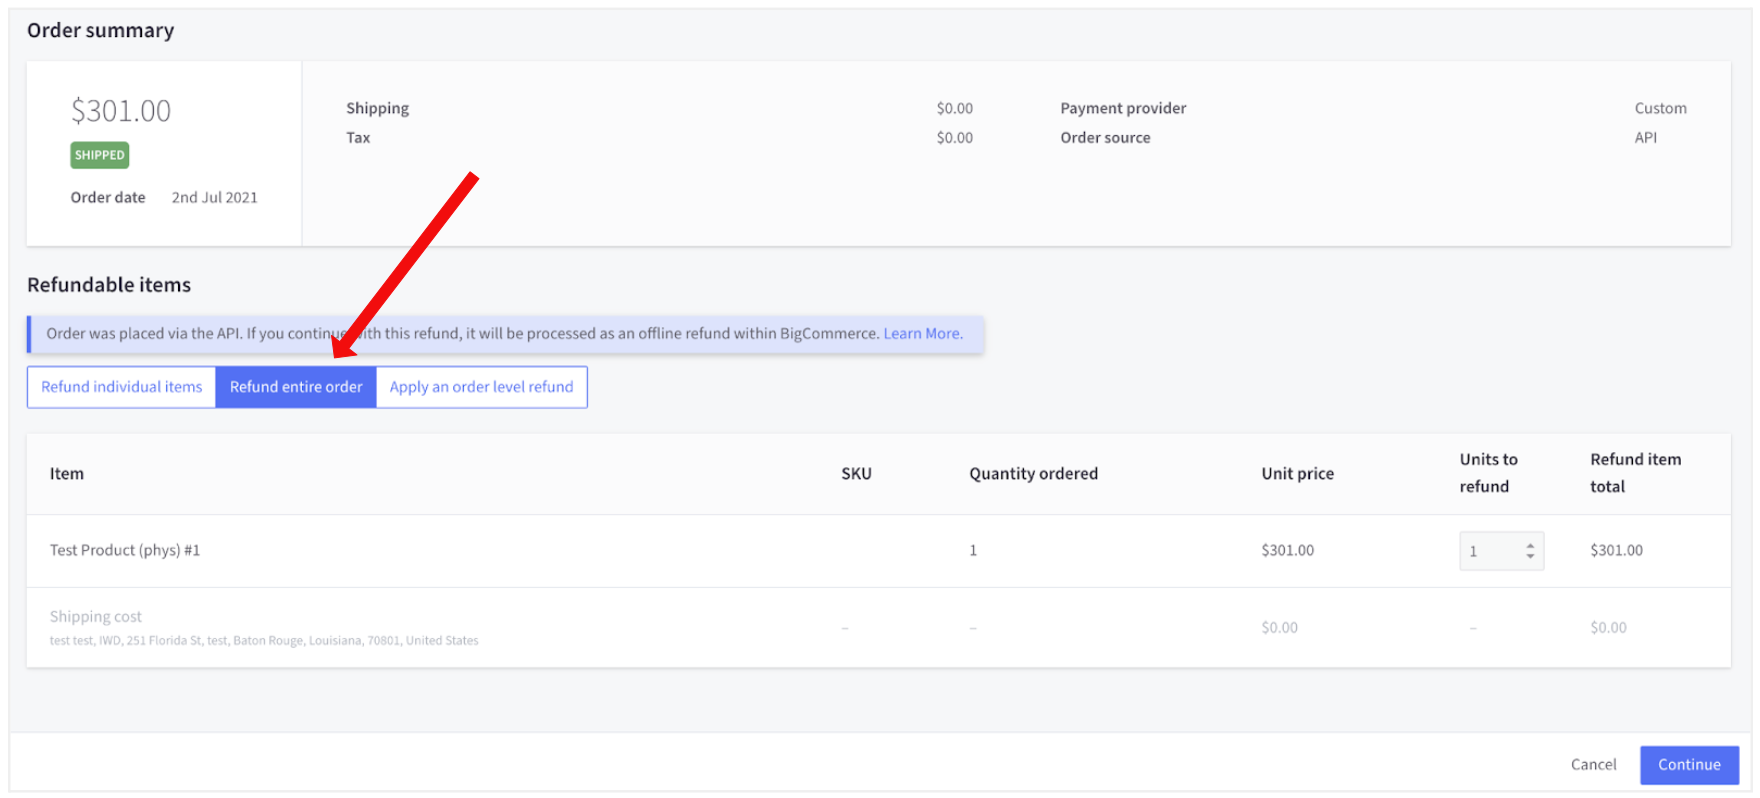
Select one of the methods below to complete your refund:
- Store Credit - The full amount will be credited to the shopper's account but no actual funds will be returned.
- Refund customer through third party provider - The refund will be processed externally to BigCommerce. Choose this option if you want to refund customers via Splitit.
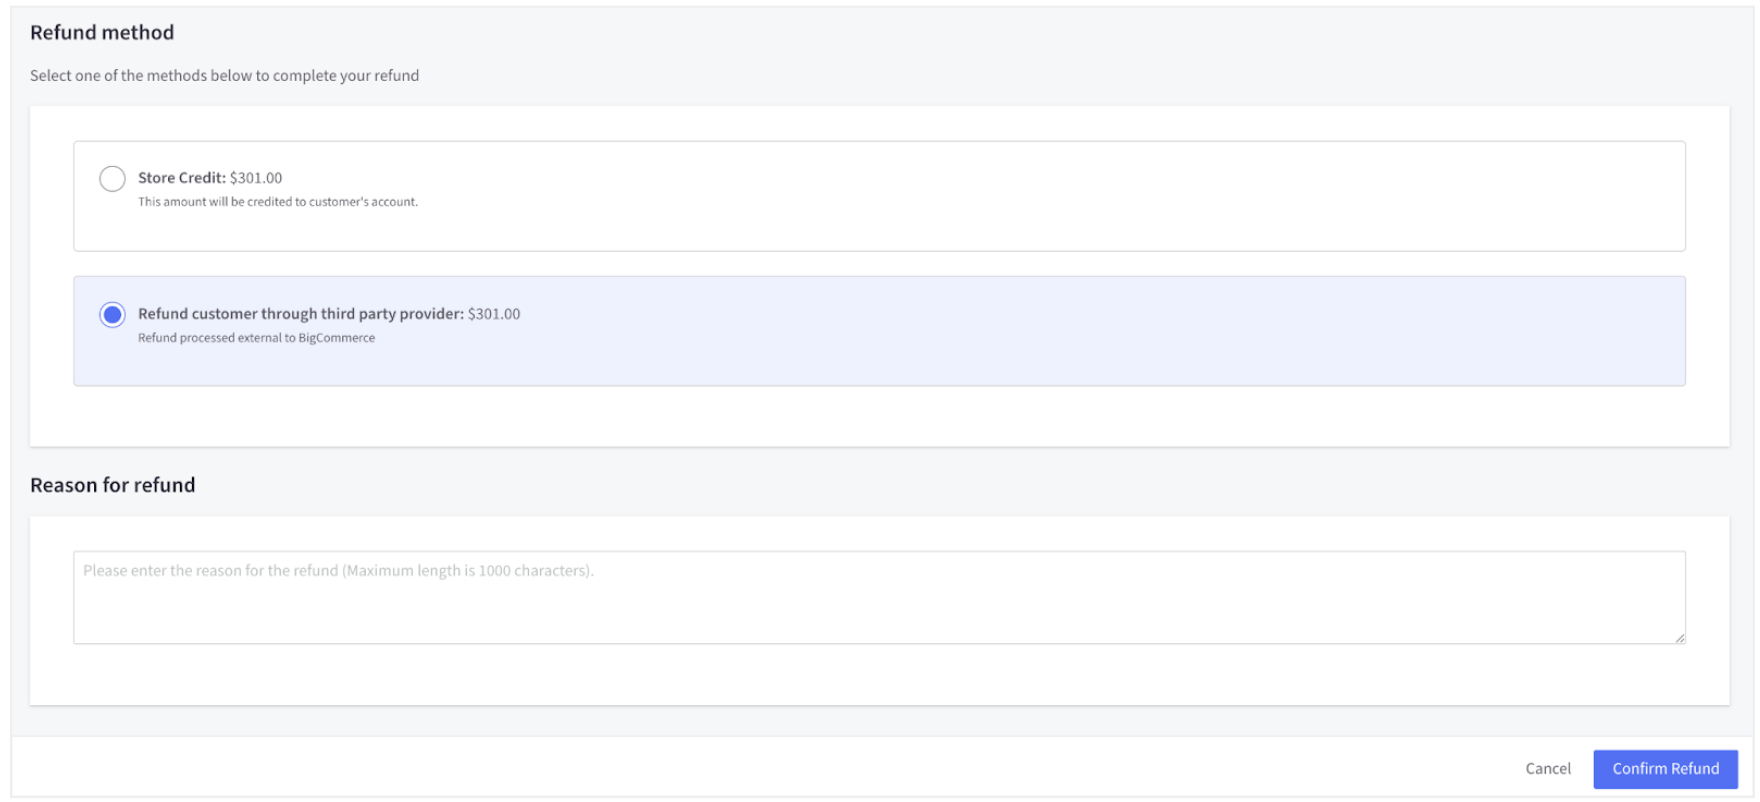
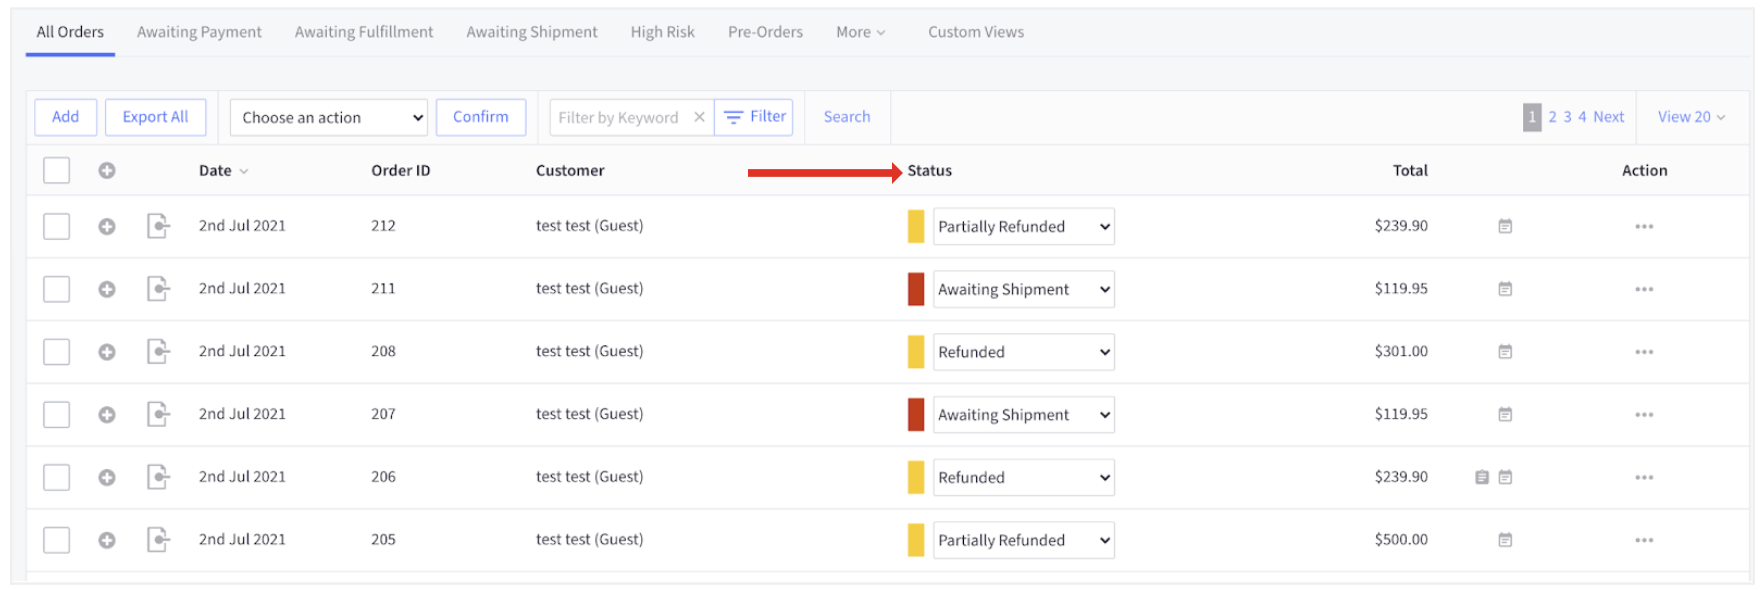
Add a reason (optional). Click on the Confirm Refund button. The order status will be changed to Refunded and the shopper will receive an email that the installation plan has been cancelled.
You can see the changes to your order statuses in the order list in your BigCommerce admin (go to Orders -> All orders):
Capture Payments and Start Installments
If Pending Shipment is enabled in your plugin's configuration, the Ship Items button will appear in the list of actions when you view your order (Orders -> All Orders -> Three Dots Menu (...) for Your Order). It enables you to capture payments and start installments for your order.
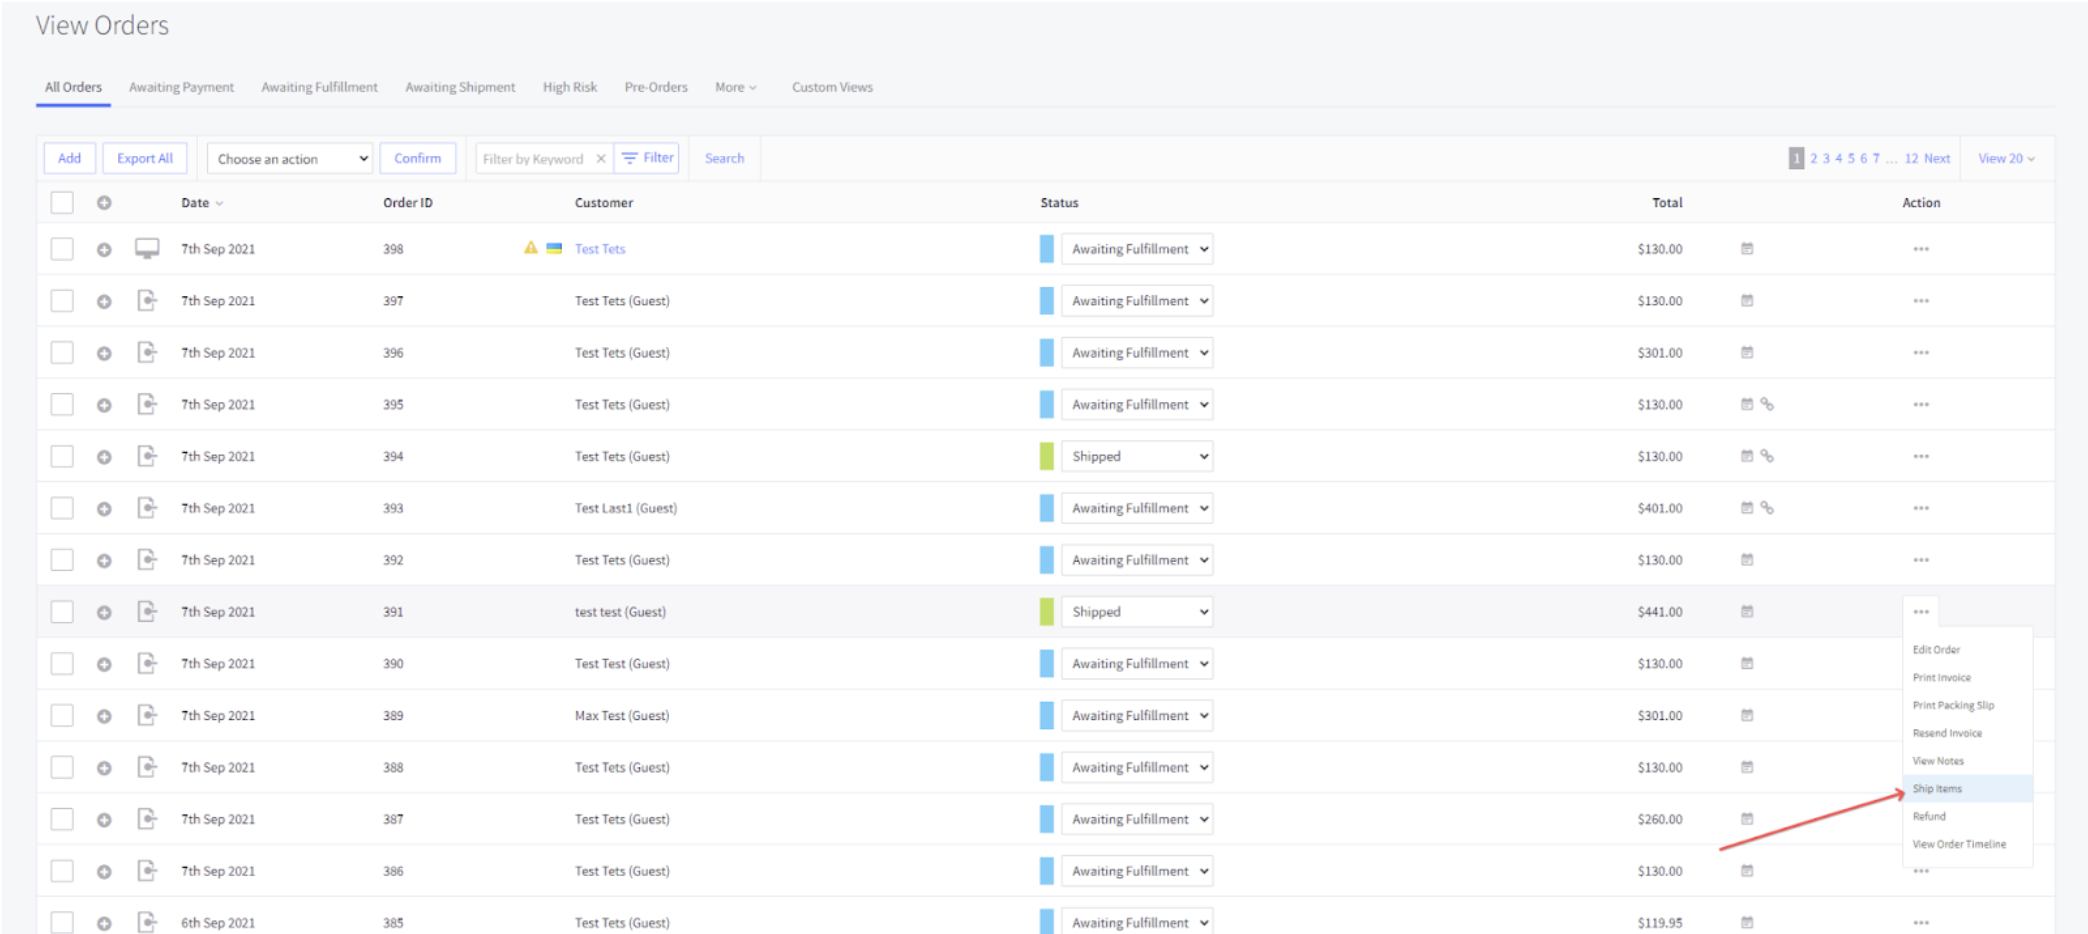
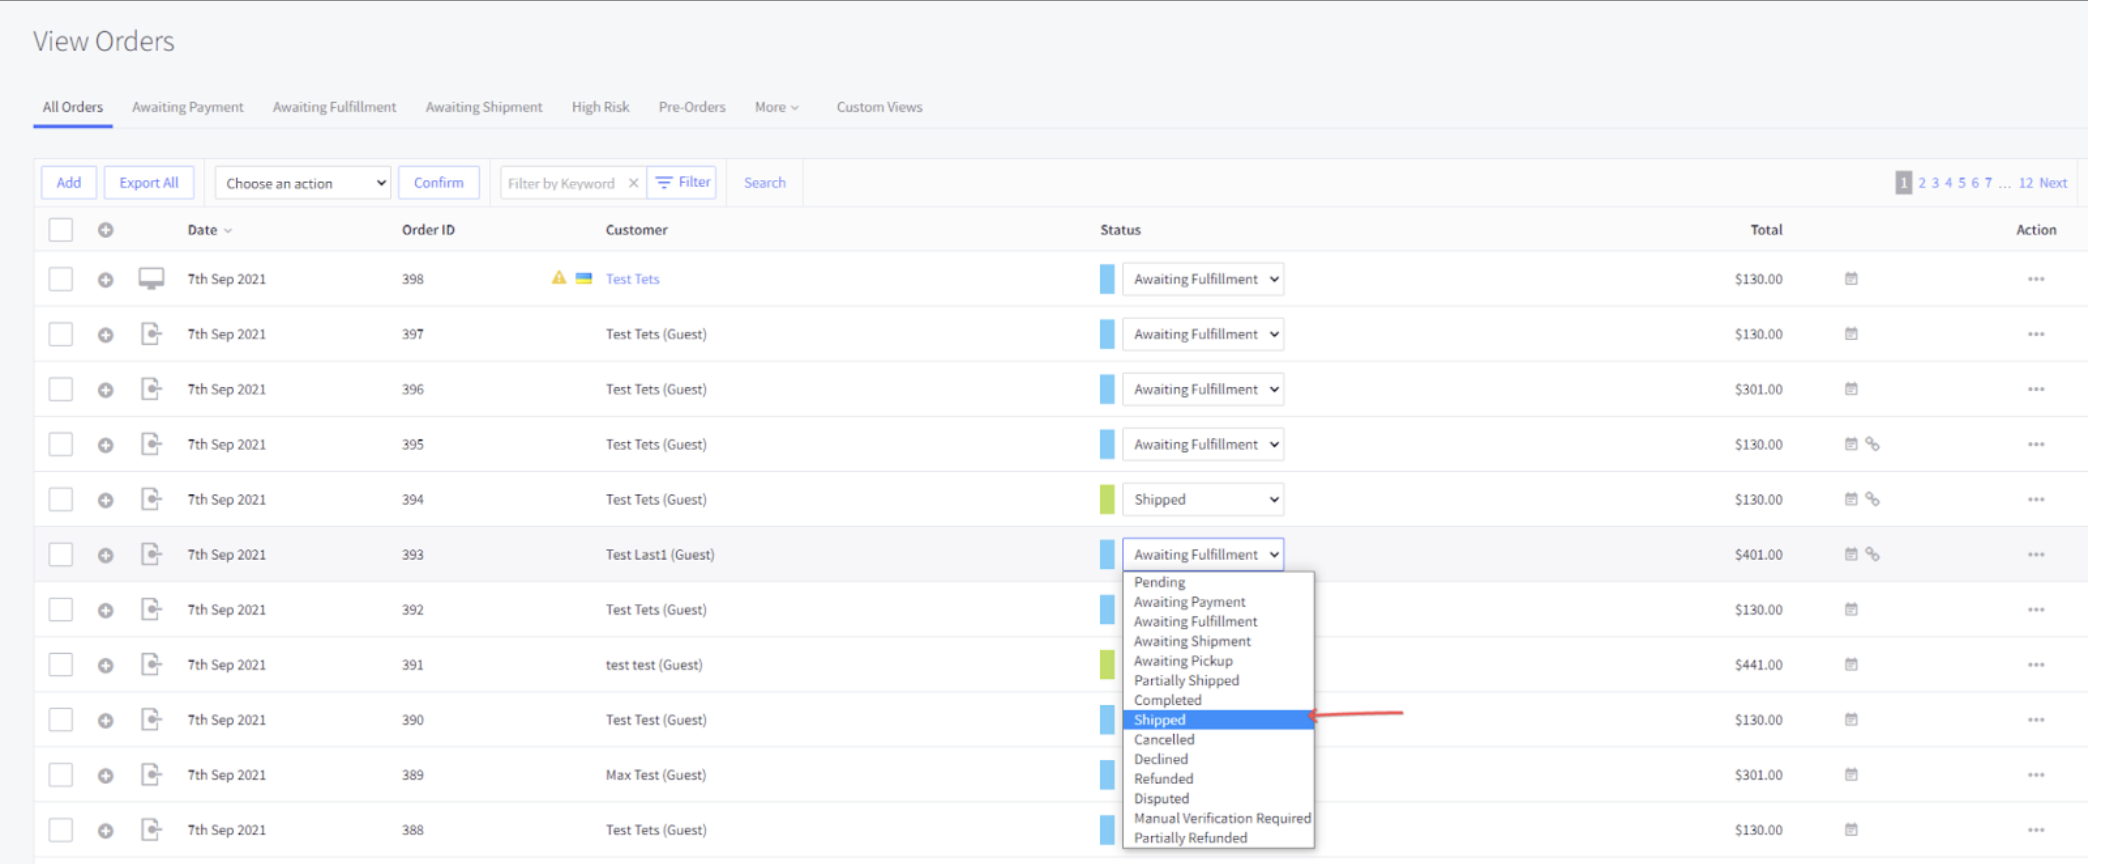
When you click Ship Items, a webhook is triggered that changes your order status to Shipped. As soon as the status is changed, the start installments functionality is run.
Understanding Order Checkout Flow (With and Without 3DS)
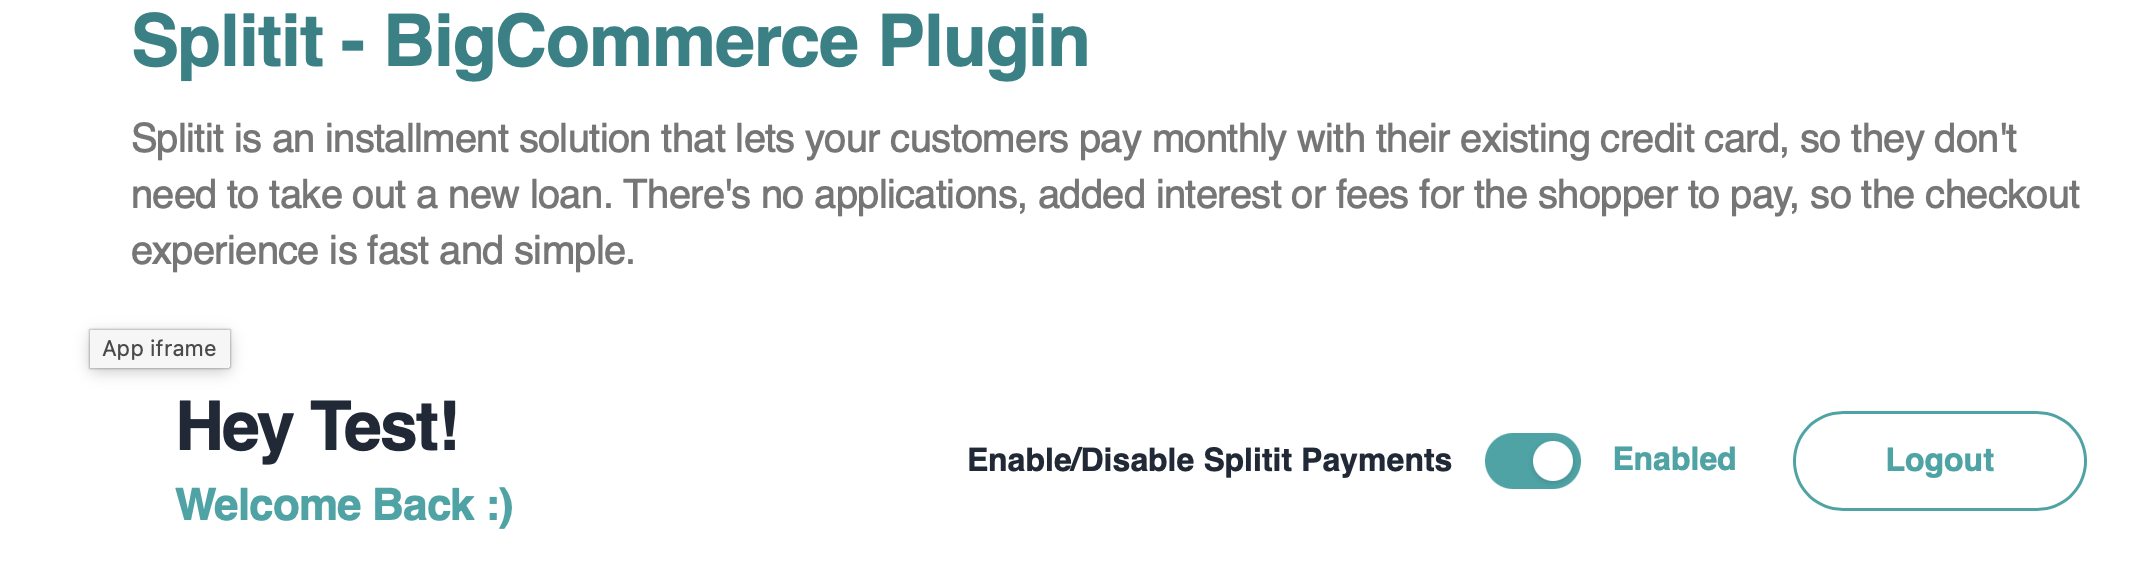
The Splitit payment option will show up on your storefront if it is enabled at the top of your plugin:
Your shoppers will have the ability to choose Splitit as a payment method at checkout if the product amount is not outside of the price range you set with Splitit. They can then enter their card info and select installment plan duration (based on plugin settings):
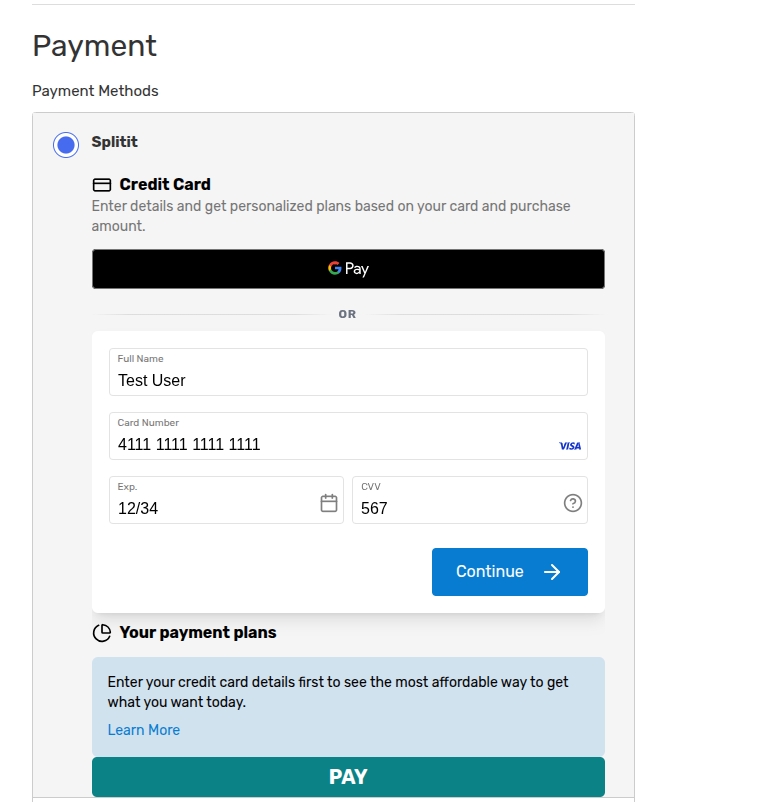
If 3D secure is not enabled in the configuration and the transaction is successful when the Pay button is pressed, the user will be redirected to the order success page (if a custom order success page is enabled), or to an empty shopping cart (default). The customer will see an error message if the transaction is unsuccessful.
If 3D secure is enabled in the admin configuration, the user will see a popup after clicking the Pay button. Once 3D secure verification is successful, the user will be redirected to the order success page (if a custom order success page is enabled), or to an empty shopping cart (default).
Conversely, the user will see the error on the payment page if 3D verification fails.